
Growing plants indoors can be tricky. Even people who have a green thumb can watch their thumb turn black when they try to grow a potted plant inside their home. I speak from personal experience on this. I tend to be able to grow most bulbs and plants outdoors with no problem. However, certain houseplants I have tried didn’t make it too long. With that being said, I have had success with upright elephant ears, Norfolk pine, jade plants, and amaryllis. Whether you have a green thumb, black thumb, or some combination of them both if you want to successfully grow indoor blooms, plant Amaryllis bulbs! We have some tips that will convince you that you can get amaryllis to grow and bloom regardless of your gardening skills.
How to Grow Amaryllis Bulbs
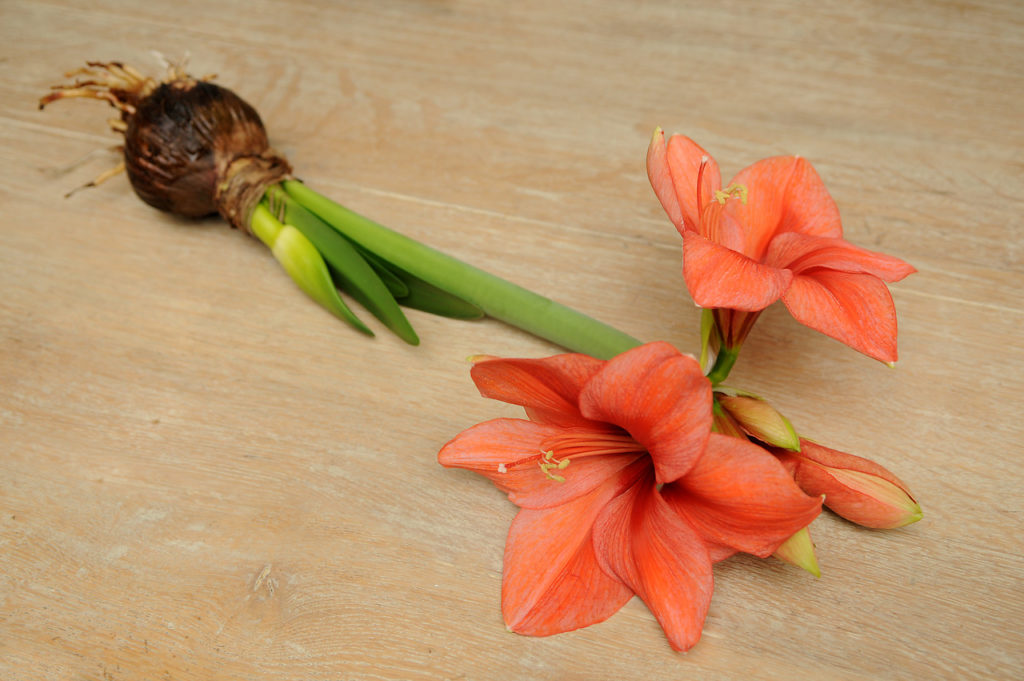
1.) Purchase your Amaryllis Bulbs
(You may skip this step if a friend or family member gifted you an amaryllis bulb.) Amaryllis are often sold in a kit that comes with the bulb, container, and soil. If this is your first time planting amaryllis an easy to grow amaryllis kit is the best choice to start with. If you have accumulated several empty pots, purchase premium Dutch grown Amaryllis that is sold as an individual bulb.
To get the longest bloom time out of amaryllis bulbs purchase amaryllis bulbs that are sold as a kit and some of the premium Dutch amaryllis. The amaryllis bulbs that come in a kit tend to bloom within 4-6 weeks of planting. The premium Dutch amaryllis can take 10-12+ weeks to bloom, depending on the variety. Therefore, purchasing an assortment of amaryllis kits and bulbs is the best way to have blooms from as early as Thanksgiving to as late as St. Patrick’s Day!
2.) Choose a Container to Grow Amaryllis
Selecting a container will be easy if your amaryllis bulb came in a kit, as a container was included with the kit. If you have an individual bulb and are wondering what container size or shape will be best you have several options.
Your container should have drainage holes at the bottom to allow the water to run through after watering. Wet, damp roots can be detrimental to amaryllis bulb growth and health. Adequate drainage is essential. The container should allow for 1-2″ of space on the sides of the bulb. The bottom of the container should have 1-2″ of extra space on the bottom of the container.
Amaryllis blooms can be very large, and the stems very tall on some varieties. For large amaryllis bulbs over 30cm in circumference or amaryllis that grow tall, make sure your container has enough weight to it. Having a sturdy container will help support the amaryllis blooms when they open. If your container is too light the amaryllis could make a mess, tip over, and break. Growing amaryllis in a cylinder vase with pebbles is an easy and sleek way to grow these indoor flowering plants. The roots should not be sitting in water if your bulb is growing in a vase with rocks.

3.) Choose a Location to Grow Amaryllis
I have witnessed amaryllis blooming in the lowest light situations imaginable. I have seen amaryllis blooming in a dark warehouse, as well as the box they were packed in. While I am not advocating for you to place your amaryllis bulb in your closest, they will grow in low-light areas of your home. However, to get the best blooms from your amaryllis you will want to place your amaryllis in a warm location that receives 4-6 hours of sun. A bright, warm location is preferred when growing amaryllis, however, they do not need full sun.
4.) Plant the Amaryllis Bulb
If your amaryllis arrived in a kit, you most likely received a soil disc or a small amount of lightweight potting soil in the kit. Typically the amount of soil in these kits is the correct amount needed for potting your amaryllis. If you are planting an individual bulb in a container you will need potting soil.

Plant amaryllis bulbs in a soil mix intended for potted plants for best results. Container soil mixes are generally lightweight. They allow for good drainage and have some nutrients to help encourage healthy roots, shoots, and blooms.
Fill your container about halfway up with soil. Place the bulb on the soil, and spread the roots out as much as the container will allow you to. Add more soil to fill up the rest of the unused space in-between the bulb and the container. Amaryllis like to have the top of the bulb and bud above ground level. Stop adding soil when 70% of the bulb is covered.
When the bulb is planted and the container is filled with potting soil, add water! Using a watering can slowly add water, enough so that the water drains through the bottom of the container. Watering at planting helps the soil and bulb to settle and eliminates air pockets.
5.) Start Growing and Blooming
Amaryllis are easy to grow and don’t typically require a lot of special care once they are planted. Amaryllis prefer the soil to be dry after the initial planting before the blooms appear.
Only water once per week or less before blooms appear. When the soil appears to be dry, this is when you will want to water. The best way to know how dry the soil is to gently place your fingers in the soil and feel if there is moisture in the soil. If it is crumbly and appearing dry add water. If there is dampness and some moisture in the soil hold off until the soil is completely dry.
When your bulb starts to show a bud coming from the base of the bulb, it won’t be long until beautiful amaryllis flowers appear. Monitor the amount of moisture in the soil when the flower bud is forming.
When the bud is ready to open keep the soil evenly moist. This will help to increase the bloom time. Amaryllis don’t need damp or wet soil. However, keeping the soil from drying when they are blooming will help create a longer bloom time.
If the amaryllis flower is too heavy and causing the pot to tip stake the flower stem. Use a garden stake, bamboo stake, or shish-ka-bob skewer to hold the amaryllis stem and flower up.
6.) Amaryllis After Care
Caring for the amaryllis is simple and will depend on what you get out of the amaryllis after it is done flowering. On average amaryllis will keep them blooms for at least 7 days. How long the blooms last will depend on their growing conditions and climate.
Hot, dry warm rooms tend to cause the flowers to wither and die quicker. If the room they are in is hot and dry because of winter heating check the soil frequently. A spray mister bottle can help with keeping the flowers from drying out quickly.
Inevitably the blooms on your amaryllis bulb will fade. Cut the flower stem down to the base of the bulb once the flower has withered. The leaves can remain attached to the bulb and do not need to be removed.
Often, and especially from the larger bulbs, another set of buds and blooms will appear within 1-2 weeks after the first set of blooms faded. When those blooms have faded, remove the flower stem to the base.
If your amaryllis has bloomed 2 or 3 times it most likely will not bloom a 4th time. At this time you leaves may start forming from the bulb. At this point, decide if you want to keep the bulb and try to get it to bloom next year, or if you want to discard the bulb and purchase a new one next season.
How to Get an Amaryllis to Bloom More than Once
If you are going to try to get the bulb to bloom again take the amaryllis outside once the danger of frost has passed in your area. During these spring and summer months, the amaryllis will more than likely be just leaves. It will not bloom again until the following winter.
Providing a period of dormancy is necessary to get the amaryllis to bloom again. Bring the bulb into a cool, dark location starting in late summer to early fall. Remove all the leaves if there are any. Remove the bulb from the soil—this will create the dormancy time required. In November you can remove the bulb from the dark location, and pot it up again in a warm and bright location.
Easy to Grow Amaryllis Care Tips
You are now equipped with all the knowledge you need to grow a healthy amaryllis bulb with multiple flowers, and hopefully multiple bloom cycles. To recap the basics of growing amaryllis, plant in a bright, warm location, in a pot with adequate drainage, keep the soil dry prior to flowering, and water regularly once the bud appears! Follow these simple principles you will have a beautiful red, pink, white or any combination of these colors on your amaryllis bulbs this winter in your home!