Archive for January, 2010

Caught in a Dahlia Daydream!

The first type of spring-planted bulb we’re going to focus on is the Dahlia. Known for its vibrant colors and tightly-packed (often large) flower heads, the Dahlia is truly a wonder to behold in the summer garden. In this article, we’ll review the advantages of using these beauties in your garden, as well as different planting techniques and tips for growing them.

The brilliant colors of Dahlias make quite the statement along a pathway!

Classification

Dahlias come in a wide range of shapes, sizes, and colors. The two largest classification of dahlias refer to the petal arrangement. These classifications are single-flowering (typically grow less than 3′ in height and blooms tend to be less than 4″ in diameter) and double-flowering (typically grow in excess of 3′ in height and forms larger blooms). The single-flowering dahlias include the Impression, Single, Orchid-Flowering, and Collarett varieties and tend to be less popular. The double-flowering dahlias consist of the Cactus, Semi-Cactus, Decorative, Dinnerplate, Ball or Pompon, Border, and Novelty varieties. The terms “single-” or “double-”flowering does not refer to how many times the plant will bloom but rather to the bloom structure itself. The single-flowering varieties bloom with just a single row of petals where as the double-flowering will have multiple rows.

Planting Dahlias

A typical dahlia tuber somewhat resembles a disfigured hand with "fingers".

When purchased as bulbs, Dahlias are sold as “tubers”. These tubers often resemble somewhat of a disfigured hand with multiple “fingers” extending downward from the center. The center of this tuber is actually the crown of the stem from the previous year’s growth! When this dahlia begins to sprout after planting, you will be able to see small green shoot protruding from this center crown. Like most bulbs, Dahlias require a well-drained soil (a good mixture of organic material including peat moss and compost manure does wonders) with little clay content. Again, like most bulbs, the Dahlia tubers will surely rot if allowed to sit wet for long spans of time. Select a location that is quite sunny (receives at least 6 hours of sunlight per day) and protected from strong winds. The tubers should be planted “fingers down” in the soil, with the center of the tuber where the stem was the year before just at the soil surface. Depending on the size of the tuber and the specific dahlia variety, spacing should typically range from 18-36″ apart, leaving them enough room to spread and grow properly.

Growing Dahlias

As previously mentioned, Dahlias should be planted during the spring season, anytime after the threat of frost is gone but before the weather gets too warm. For most of the United States, this time period falls between mid-March and mid-May. Dahlias will

Dahlias come in a wide variety of colors and shapes.

begin blooming mid-summer and most will continue on in the late summer and sometimes early fall! Keep the soil moist but definitely not saturated during the summer months. Once the plants reach a foot or so in height, the terminal shoot (or center stem) of the plant can pinched back to encourage branching. For increased flower size, pinch back the lateral (side) flower buds to direct more energy and nutrients to the main flower bud at the end of the stem. Fertilize once per month during the growing season with a water soluble fertilizer (such as Miracle-Grow).

Tuber Storage

Once the plants have completed their growing and blooming cycle, the leaves and flower stems will begin to die back as they enter their dormant stage. Dahlias are hardy in Zones 8, 9, 10, and 11. In these areas, simply cut the stems back to with 1-4″ of the soil surface once they have completely died back. Leave the tuber in the ground for the remaining fall and winter. If located in zones north of Zone 8 (Zones 1-7), you will need to take special care of the tubers in order to protect them from the harsh winter weather. Southern parts of Zone 7 can usually get away with giving the tubers a good drink of water in the fall and placing a think layer of mulch over the area where the tubers are planted. To be really sure, however, the tubers will need to be removed from the soil and overwintered indoors. To do so, follow these simple steps:

  1. After the first frost, cut back the foliage and stems to within 1-4″ of the soil surface.
  2. Carefully dig out the dahlia tuber, being sure not to sever any of the “fingers”. In order to avoid this, begin by digging at least 12″ away from the center of the plant in all directions.
  3. Gently brush off any excess dirt from the tubers and spread them out in a shaded, well-ventilated area for several days. Do NOT leave the tubers in full sun.
  4. Pack the tubers upside down in a well-ventilated box, basket, or bag using slightly damp vermiculite, perlite or peat moss, covering the clumps of tubers.
  5. Store in temperatures of 35°F to 50°F and protect from hot or cold drafts.
  6. Replant in the spring once ground has thawed.

One of the longest summer blooming bulbs, the variety and vibrant colors of Dahlias are something you won’t want to leave out of your summer garden this year. Whether you’re a veteran gardener or just starting to get your hands dirty, these tubers are sure to please without much fuss. Looking great in the garden as well as in a large vase on your dining room table, try some this year and be the talk of the town!

Until next time,

Have a question about dahlias or any other bulb gardening topic? Ask Bridget! Email her at bridget@bulbblog.com! If she features your question in a future post, you’ll receive a Holland Bulb Farms coupon for your next order at Holland Bulb Farms!

Bridget Bulb | Create Your Badge

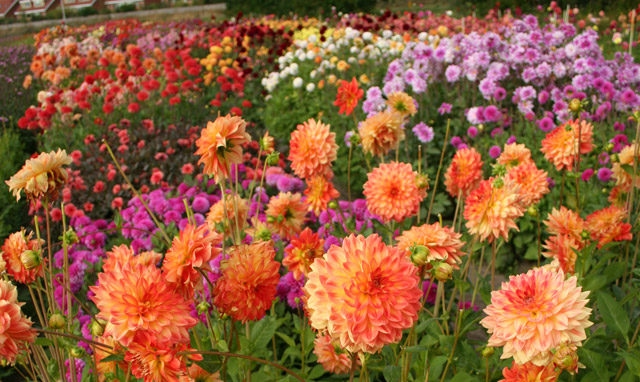
What’s all this about Spring Planted Bulbs???

When you think of “flower bulbs” what comes to mind? If you’re like most people, you immediate picture fields of tulips and daffodils, or maybe groupings of hyacinth. While this idea of bulbs is definitely a correct one, it is also somewhat limited. Did you realize that there are actually two planting seasons for bulbs? These planting seasons are classified as “fall planted” and “spring planted” bulbs.

Fall bulbs are extremely popular and add great color to the spring garden!

Fall planted bulbs, as I mentioned earlier, are definitely the more well-known bulbs in the group. These include your allium, crocus, daffodils, fritillaria, hyacinth, iris, muscari (grape hyacinth), scilla, and of course, the tulips. These bulbs are typically planted sometime between mid-September and mid-December, depending on  your hardiness zone and then bloom the following spring. Many of these bulbs actually require a chilling period (the winter season) in order to bloom and grow correctly. Therefore, gardeners who live in Zones 2 through 7b/8 can grow these without any special care and leave the bulbs in the ground year round. On the other hand, gardeners who live in warmer climates (Zones 8 through 11) and don’t receive this chilling period naturally outdoors, need to provide these bulbs with the cool period artificially, such as in a refrigerator prior to planting every year.

Dahlias are just one of the many amazing spring planted bulbs that can add great color to your late summer and early fall garden.

Spring planted bulbs are somewhat less well-known in the “bulb world” but are just as valuable to the landscape! These bulbs include anemone, begonias, calla lilies, canna lilies, dahlias, elephant ears, gladiolus, oriental and asiatic lilies, and herbaceous perennials. These bulbs are best planted between early March and late May, again depending on the hardiness zone in which you are located and then bloom in the summer and/or fall. Many of these bulbs (with the exception of oriental/asiatic lilies as well as herbaceous perennials) are not frost hardy and therefore need protection or special care during the winter in Zones 2 through 7b/8. However, the gardeners in Zones 8 through 11 can leave most of these bulbs in the ground year-round without the worry of frost damage.

Since the spring planted bulbs are often overlooked but yet have oh-so-much to offer, I figured it might be good to review them. Over the next couple of weeks, I am going to lead you through the land of the spring planted bulbs. Each article will focus on a different type of spring planted (summer/fall blooming) bulbs, highlighting their great qualities as well as pointing out any maintenance tips that may be important. So follow me on this wonderful journey and open your eyes to this wonderful world of spring planted bulbs!

Until next time,

Have a question about when to plant a certain type of bulb or any other bulb gardening topic? Ask Bridget! Email her at bridget@bulbblog.com! If she features your question in a future post, you’ll receive a Holland Bulb Farms coupon for your next order at Holland Bulb Farms!

Don't be a grump just because it's cold! Start your "summer dreaming" today!
Don’t be a grump just because it’s cold! Start your “summer dreaming” now!

Beat the Winter Duldrums: Start Planning your Summer Garden TODAY!

For those of us who live in “cold winter” areas, as Begonia and I do, right about now the snow is beginning to “lose its luster”. The holidays are over with nothing left to look forward to but another several months of wet boots, red noses, and frozen car doors. So why not bring the spring and summer INTO your home by starting your “summer dreaming” a little early this year?!

Did you realize that many online as well as catalog bulb and perennial companies have already started accepting pre-orders for spring planted items, such as cannas, callas, dahlias, and assorted perennials? You can be far ahead of the game just by beginning to plan now and making your selections before the spring rush begins.

So you may be wondering: how do I even begin to decide what I want to plant this year? Even though this may seem like a daunting task, planning your garden should be one of the most fun and enjoyable things you do! Make it easy on yourself this year by following these easy steps:

  1. Decide on a location. Pick a spot of your yard that you feel needs “extra attention”. Or perhaps for you it’s simply your favorite raised planter or decorative container. Have a specific project, such as a flowerbed around your mailbox or in that shaded part of your already existing garden? Perhaps this is the year you want to tackle it! Whatever you do, don’t “over-commit” yourself. Doing so will only leave you tired and frustrated. Have the courage to a pick a slightly smaller project and do it WELL rather than taking on more than you can handle and leaving yourself disappointed by the results.

    Let your imagination bring the warm weather to you!

    Let your imagination bring the warm weather to you even on the coldest day!

  2. Start collecting ideas. Collect all of the information you can find: garden magazines, website and blog articles, plant catalogs, and web addresses to some of your favorite plant sources. When you see something you like, tear it out or print it off and begin a “summer dreaming” journal. Try not to get too hung up on plant height, color, light requirements, etc. at first. These will only limit your creativity.
  3. Look through your treasures. Once you feel you have collected a good amount of information, sit down with your journal and sort through what you have found. Can you find any common themes in the plants/ideas you’ve selected (formal garden settings, color patterns, exotic-looking plants?). Begin to think about these ideas in relation to the location you had pre-determined to “fix-up” this year. Will they work here? Does the area get enough sunlight or too much? Do the colors go together or do they clash?
  4. Begin building the dream. Now that the information you have collected has been somewhat organized, decide which direction you will take and separate the plants/ideas that will be included this season. Do NOT throw the rest of it away! Keep all of these ideas in a folder to re-visit at a later time and don’t EVER tell yourself “no” to an idea you truly love. Yes, it may be true that you don’t have the money to have an 8 foot tall marble fountain in the middle of your backyard surrounded by 5′ cannas. But that doesn’t mean you can’t someday do something very similar, just on a smaller scale. Again, it may be true that you just don’t have enough sunlight in your backyard to grow the climbing wisteria vine  you’ve always dreamed of but that doesn’t mean that there aren’t other climbing perennials which would work wonderfully in a more shaded landscape and provide just the same effect.
  5. Go shopping! Join newsletters and email lists to your favorite websites and suppliers and begin watching for coupons. Start finding specific sources for your purchases and don’t wait too long to place your order. Once the weather starts to warm up, there will be many gardeners thinking about making these purchases and you won’t want to get left out in the cold :)

From now on, whenever the winter rain, sleet, or snow starts to get you down, head to your favorite garden website or magazine and continue your “summer dreaming”. It won’t be long before it’s here and you want to be ready for it, don’t you???

Until next time,

grcbb_signature

Have a question about your “summer dreaming” or any other bulb gardening topic? Ask Bridget! Email her at bridget@bulbblog.com! If she features your question in a future post, you’ll receive a Holland Bulb Farms coupon for your next order at Holland Bulb Farms!